 Carving out sales territories is often a daunting task for sales managers. Many sales territory products, while robust and feature rich are just plain overkill for the average sale manager.
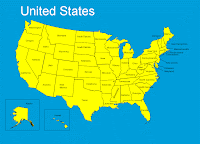
The following instructions will explain exactly how to use an editable USA sales territory map in PowerPoint to illustrate territories or regions for sales representatives. The same methods can be used for any editable vector map in PowerPoint.
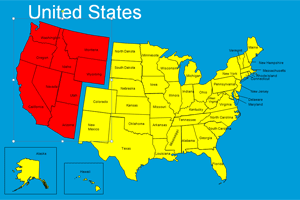
Once the map is customized for your unique sales territories, you can save the map as a graphic for use in business plans, sales plans, marketing plans or include in sales meeting presentations.
For the purpose of this tutorial, I will use an editable PowerPoint map of the USA in vector format. Vector means that it consist of shapes or objects which can be edited, resized and re-colored without losing quality.
Once the map is open, you will see the United States with state outlines. Sometimes objects are grouped together. If this is the case, you will need to “ungroup” the objects (or in this case states) in order to edit each individual object. To ungroup objects, simply select the group. This will put a border around it. Right-click on the grouped object, chose “grouping” then “ungroup”. This will break apart the objects so that they can be edited individually.
Changing Object Color
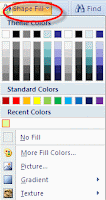
 Using the drawing tools provided by Microsoft PowerPoint, you can select each individual object and apply a color to it using the “fill” tool. To change an object’s color simply click on the “Shape Fill” located in PowerPoint’s drawing tools palette and choose the color you want to use. As soon as you choose the color, the selected object(s) are colored.
Selecting Multiple Objects at Once
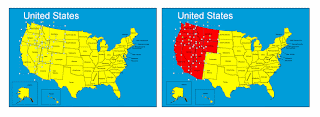
When working with a map, it is sometimes necessary to change the color of multiple objects (states) to the same color to illustrate a region or territory. This is accomplished easily by selecting multiple objects at once, then changing using the shape fill to color those objects at once.
To select multiple objects (states), simply hold down the “Shift” key while clicking on the objects with your mouse. See below.

Once you’ve selected all objects, click on the “shape fill” tool and choose the desired color.
Grouping Objects
Finally, if you’ve selected multiple objects to define a territory or region, you may want to keep those objects in a “group”. This is easily accomplished by grouping the objects. To group the objects, select the object you want to include in the group. Then, right-click on your new selection, choose grouping >> group. The next time you want to make changes to that territory all you need to do is select the group!
